Let’s get back to Basics – Embroidery Tension
Greetings from the Great Southwest…I hope my message finds all of you well as we prepare to enter the busy holiday season. Here at Qdigitizing things will be busy from now through the second week in December when things will start to slow down. During this period if you have any special requests please do not hesitate to let us know what you might need. All of us at Qdigitizing will always do our best to help you shine with your customers.
For this months’ blog I would like to start a series that I am going to title, “Let’s Get Back to Basics.” Over the next few newsletters I will review some basic concepts in embroidery that are vital to quality embroidery. Over the past few years new and fancy techniques have become “all the rage” inside our world. These techniques (like Puff Embroidery) are fantastic but if basic embroidery techniques are not adhered to it will not be possible to achieve satisfactory results on basic patterns let alone advanced techniques.
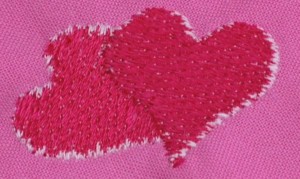
For this installment I am going to tackle basic tensioning for your lock stitch embroidery machine. This discussion assumes your machine is in good repair, you have properly prepared your materials and you have decent digitizing. With those three things in place as an embroidery machine operator the single most important thing you can do to ensure quality embroidery is to make sure top and bottom thread tension is properly adjusted on your machine.It is easy to tell when tensions is bad; typically you will see one of two things; 1. Top thread tension too loose will cause the top thread will loop and/or appear to be very loose or 2. The bottom (bobbin) thread will pull up from the back and leave what appear to be white flecks showing on the edges of your stitching.
Bad tension on Column and Walk Stitches

Bad Tension on Fill Stitches
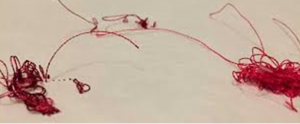
If thread tension is completely out of whack you might experience the ultimate tension fail, the dreaded “Bird Nest.” Bird nesting is caused when the bobbin tension is so loose the machine will not form stitches. When this happens the top thread will gather in a big ball under the throat plate. The machine will try and suck your garment through the throat and will almost certainly tear a giant hole in your product.
Once tensions problems are identified they are relatively easy to correct. My advice is you should always make sure your bobbin tension is correct before you try and adjust top tensions. To do this there are several tools and techniques you can employ.
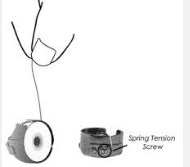
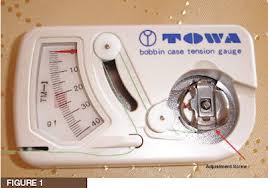
The piece of hardware shown here was my personal favorite. To use this tool (available through any decent thread supply company) you simply thread the bobbin through the gauge and gently, with consistent force, pull bobbin thread through the gauge. I have found that a tension of about 25 to 30 is perfect. This tool is fantastic for achieving consistent tension across multiple heads in an embroidery facility.
If you are a single head shop and you don’t want to invest in the tension gauge you can always perform the, “drop test.” To do this hold your bobbin by the thread after you have removed the bobbin thread from the pig tail assembly. Pull out an inch or so of bobbin thread, suspend the case by the thread and give a gentle tug like playing with a yo-yo. The bobbin case should drop about 1.5″ to 2″ If it does not move at all your bobbin thread is too tight, if it drops further your tension is too loose.
Once you know if your bobbin tension is too tight or too loose you adjust by using the small screw on the side of the bobbin case. One thing to be aware of, many times a ball of lint will gather under the bobbin case spring. This ball can be very small but it will cause dramatic tension problems. To clean this out NEVER use a sharp object. Rather, take a business card and slide it between the spring and the side of the case. If there is a glob of material this will clean it out. Then you can adjust your tension.
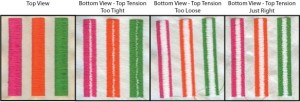
Once you have adjusted your bobbin tension you can perform a test to check your top tension. Create a program that does nothing but embroiders a set of column stitches. Sew this test file, take it off your machine, flip it over an look at the back. Use the image below as a guide for how to dial in your tension(ers).
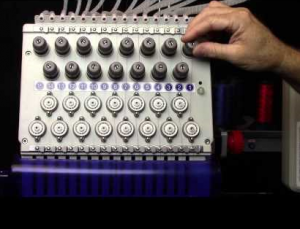
Unless your machine has some method for adjusting top tension (like the Melco Amaya machine) there will be tensioners. Turning the tension clockwise will tighten the top thread tension will turning counter clockwise wise will loosen the top tension.
Some machines will have two rows or sets of tensioners. 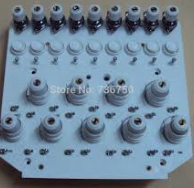 In these cases you can consider the top row as a “rough tune” and the bottom set the fine tune. When you have this type of set up the very most top tensions should be “set” then forget. If you try and use the top tensioners to dial in small changes you will be chasing a unicorn. The top tension should be just barely firm enough to let the thread pass without any “hitches.” If you tighten this even a little too much you can cause serious tension problems. Since this is one of those areas where you might “set it and forget it” you need to be careful to make sure lint does not build up between tension discs. If a ball of lint gathers between the discs it must be cleaned out or you will not be able to get proper tension in this area.
Thread tension can be frustrating. The smallest change to tension can have dramatic results to quality. For example, if you are embroidering on white thread, everything looks great. You change the cone out to black and next thing you know you are pulling up bobbin thread. The fact of the very matter is, black thread is thicker than white thread and a change between the two “may” require a slight adjustment to your top tension. Small changes like this will usually not require a bobbin thread adjustment. the point is to understand what has caused the change and then apply the appropriate fix.
Next month I will discuss embroidery backings and how to properly prepare your apparel for embroidery. Between now and then if you would like to reach out to me about any topic relating to commercial embroidery and/or embroidery digitizing please do not hesitate to send me a message here or email me at steve.freeman@qdigitzing.com.
Blog with you soon,
Steve Freeman
Managing Partner
Qdigitizing.com
steve.freeman@qdigitizing.com
